Source
The phone, media player, radio, USB source, wireless adapter, or receiver provides the original information. Clean input quality gives the rest of the system a better foundation.
Car Stereos, Car Speakers, Wireless CarPlay Adapters, Bluetooth FM Transmitters, Car Chargers, Dash Cameras, Backup Cameras, OBD2 Scanners, and GPS Trackers form the connected Carvexa driving ecosystem.
Build a cleaner, stronger, more intentional in-car listening system.
A successful vehicle audio upgrade is not defined by the largest screen, the highest advertised wattage, or the longest specification list. It begins with a clear understanding of how the source, signal, installation, speakers, cabin, and listening preferences work together. This guide explains the fundamentals so every purchase supports a coherent result.
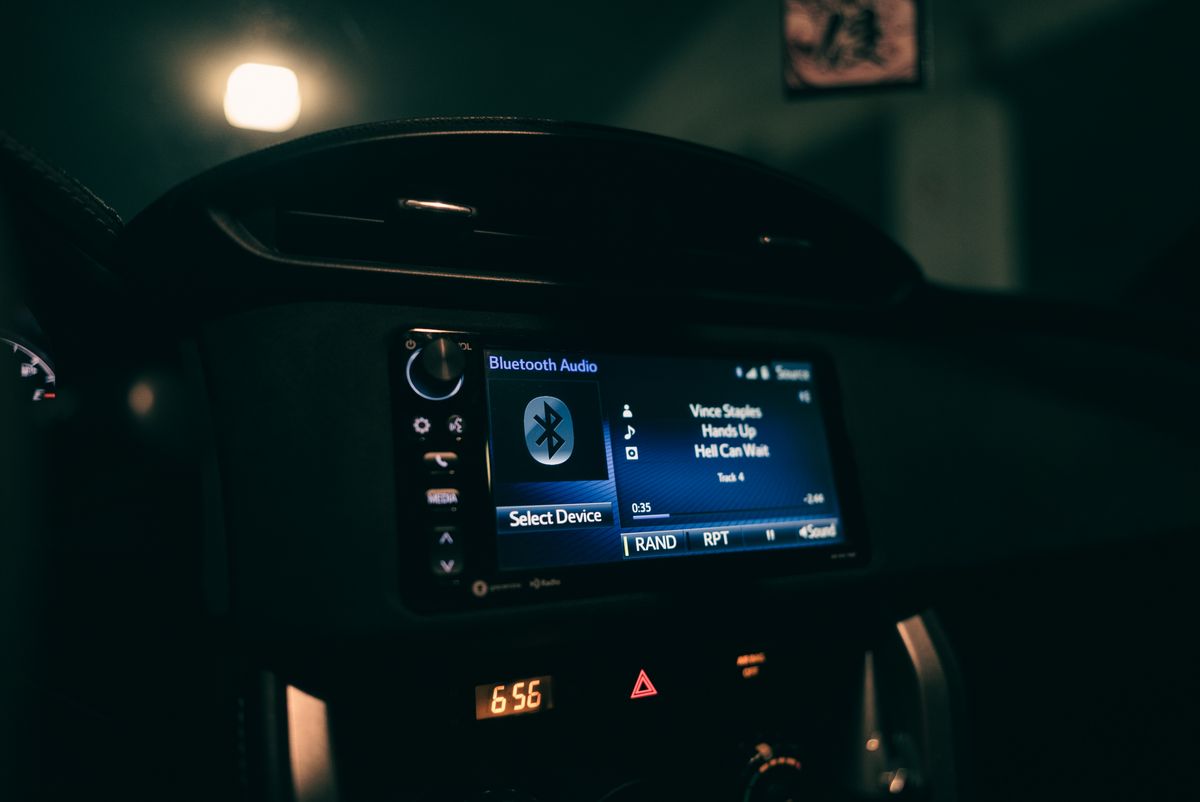
Every song begins as a source signal. That signal may come from a phone, a wireless CarPlay connection, a Bluetooth stream, a USB device, a radio tuner, or another media source. The receiver interprets that information and sends an audio signal through the rest of the system.
From there, processing and amplification shape the signal before the speakers convert it into sound. Weakness at any stage can reduce clarity. A high-quality speaker cannot fully recover detail already lost through a poor source, aggressive compression, incorrect gain settings, weak wiring, or a distorted amplifier stage.
The most effective upgrade strategy treats the vehicle as one connected environment. Source quality, speaker placement, door construction, road noise, seating position, cabin materials, and electrical capacity all influence the final result.
The phone, media player, radio, USB source, wireless adapter, or receiver provides the original information. Clean input quality gives the rest of the system a better foundation.
The stereo or processor manages volume, balance, equalization, time alignment, crossovers, source selection, calls, and interface behavior.
The internal or external amplifier increases the signal so the speakers can reproduce music with suitable output, stability, and dynamic range.
Speakers transform electrical energy into audible sound. Their size, placement, construction, mounting, and tuning determine how the cabin presents the music.
Audio does not exist in isolation. Connectivity, power delivery, visibility, diagnostics, and vehicle awareness can all influence how the dashboard functions and how confidently the system is installed.
The receiver is the control center for media, calls, navigation prompts, screen interaction, source switching, and audio adjustment. Evaluate dashboard fit, input options, outputs, interface speed, steering-wheel control compatibility, camera inputs, and installation accessories.
Primary Audio ControlSpeakers define tone, detail, imaging, and output. Correct size, impedance, mounting depth, efficiency, and power handling matter more than appearance alone.
Acoustic OutputThese adapters can reduce cable handling while retaining a familiar phone-based interface. Confirm that the vehicle already supports compatible wired CarPlay.
Wireless InterfaceA practical connection option for vehicles without modern media integration. Placement, available power ports, local frequency congestion, microphone position, and charging output can affect everyday usability.
Legacy ConnectivityStable power supports phones, adapters, cameras, and other in-car devices. Match the available port, connector type, cable routing, charging standard, and total shared output to the devices used in the cabin.
Device PowerDash cameras add driving documentation and may share dashboard power, cable routes, mounting space, and accessory sockets with audio equipment. Plan power distribution and wire concealment before installation.
Forward VisibilityCamera integration may influence stereo selection because the receiver needs a suitable video input, trigger connection, screen response, and compatible display behavior.
Rearward AssistanceDiagnostic tools can help identify warning codes and operating information, but they should be used with the correct connector and an understanding of the vehicle platform.
Vehicle DiagnosticsGPS trackers add location awareness and may require discreet placement, charging, subscription management, signal access, or a hardwired power strategy depending on the product design.
Location Awareness
Start by listening critically to the current system at normal driving speed. Use familiar music and note what is missing. Vocals may sound distant, cymbals may become harsh, bass may feel thin, doors may vibrate, calls may be unclear, or the interface may simply be too slow and inconvenient.
Separate audio problems from interface problems. A stereo upgrade can improve source access and control, while a speaker upgrade can improve tonal detail. An external amplifier may provide more authority and headroom, but it will not correct poor speaker mounting or an unsuitable signal.
Consider the entire cabin. Road and tire noise can mask low-level details. Reflective glass and hard surfaces can emphasize higher frequencies. Speaker positions may pull the sound toward one side. Door cavities may reduce mid-bass performance when they are not sealed or stabilized.
There is no single order that fits every vehicle. The strongest sequence is the one that solves the most important limitation first while protecting future compatibility.
Record the year, make, model, trim, factory audio package, dashboard configuration, steering-wheel controls, camera system, speaker locations, speaker sizes, available power ports, and any original equipment features that should remain functional.
Decide whether the system needs better connectivity, clearer speakers, additional output, stronger bass, reduced distortion, improved call quality, camera integration, or a more responsive interface. Avoid replacing several components without knowing which issue each one is expected to solve.
Check mounting dimensions, speaker depth, wiring harnesses, data interfaces, antenna adapters, trim panels, camera compatibility, amplifier integration, impedance, polarity, and retained vehicle functions. A compatible installation plan should exist before the product order is finalized.
Match speaker sensitivity and impedance to available power. Confirm that an external amplifier can operate safely with the selected load. Leave suitable adjustment range for gain, crossovers, equalization, and source volume without forcing any stage to operate at its limit.
Disconnect power when appropriate, protect panels, route signal and power wiring carefully, secure connections, maintain correct polarity, avoid sharp edges and moving components, stabilize mounting surfaces, and verify every retained function before final reassembly.
Begin with neutral settings. Confirm balance and polarity, establish safe crossover points, set amplifier gain correctly, reduce major tonal problems before boosting frequencies, and listen from the normal driving position with the vehicle operating under typical conditions.
Product specifications are useful only when they are interpreted in the context of the vehicle. These three checks prevent many of the most common installation and performance problems.
Tuning should reduce problems before it adds emphasis. Small, deliberate corrections generally sound more natural than dramatic equalizer curves or excessive bass and treble boosts.
A useful system is designed around real driving habits. These profiles illustrate how different priorities can lead to different component choices without creating an unbalanced installation.
Designed for drivers who want clearer vocals, cleaner calls, easier source access, and comfortable listening at moderate volume during routine travel.
Designed for drivers who value wireless phone integration, charging, navigation, calls, media control, and a clean dashboard workflow.
Designed for listeners seeking stronger output, wider dynamic range, improved mid-bass control, and greater authority without excessive harshness.
Prepare this information before selecting products or beginning installation. A complete brief reduces guesswork and makes compatibility questions easier to answer.
Record the complete year, make, model, trim level, body style, dashboard configuration, and factory audio package.
List the current stereo, speakers, amplifier, cameras, chargers, adapters, microphones, diagnostic devices, and tracking equipment.
Identify the features that must remain operational, including steering-wheel controls, warning tones, factory cameras, USB ports, vehicle settings, and original amplifiers.
Rank clarity, bass, volume, connectivity, call quality, screen usability, navigation integration, and ease of control in order of importance.
Measure dashboard space, speaker diameter, speaker depth, grille clearance, mounting points, cable routes, and potential device locations.
Note the available accessory sockets, USB ports, fuse locations, amplifier wiring routes, grounding points, and total accessory power requirements.
Decide whether the work will be completed personally or by a qualified installer, particularly when vehicle data systems, airbags, factory amplifiers, or complex panel removal are involved.
Prepare reference music and a checklist for audio channels, polarity, controls, microphones, cameras, charging, retained functions, panel fit, and unwanted vibration.
These answers provide a practical starting point. Vehicle-specific fitment and electrical requirements should always be confirmed before installation.
Replace the component that creates the largest limitation. A stereo may be the priority when connectivity, control, outputs, camera integration, or interface speed is the main concern. Speakers may be the priority when the current system has acceptable features but lacks clarity, balance, or output. Confirm how the factory system is integrated before choosing either path.
No. Power ratings must be interpreted with impedance, sensitivity, continuous output, distortion, installation quality, and listening distance. A well-matched system with moderate power can sound cleaner and more controlled than a poorly matched system built around large peak-power claims.
Not automatically. Speaker size, enclosure behavior, door sealing, mounting rigidity, available power, crossover settings, and cabin acoustics all affect bass performance. Replacement speakers may improve clarity and control, but deep bass may require a dedicated low-frequency solution.
Wireless adapters generally depend on an existing compatible wired CarPlay connection. They do not normally add CarPlay to a vehicle that has no supported wired CarPlay function. Confirm the vehicle, stereo, USB connection, phone requirements, and adapter compatibility before purchase.
Harshness may result from aggressive equalization, excessive gain, poor source quality, reflective cabin surfaces, unsuitable speaker placement, incorrect crossover settings, distortion, or a tonal mismatch between components. Return settings to neutral and adjust one variable at a time.
It is not mandatory for every installation, but controlled treatment around speaker mounting areas can reduce vibration, improve mounting stability, and support more consistent mid-bass performance. Coverage should be planned carefully so drains, mechanisms, wiring, and service access remain functional.
Poor-quality power accessories, unsuitable grounding, damaged cables, crowded routing, and electrical noise can contribute to unwanted sound. Use suitable components, secure connections, thoughtful cable routing, and correct grounding practices throughout the vehicle.
Professional assistance is worth considering when the vehicle uses complex factory integration, data-controlled functions, external amplifiers, active safety systems, difficult panel removal, custom fabrication, high-current wiring, or detailed acoustic tuning. A careful installation protects both the equipment and the vehicle.
Share your vehicle details, current equipment, required features, and listening priorities with Carvexa. Clear information makes it easier to evaluate fitment, connectivity, installation needs, and the most logical next step.